Done, I signed up. Now how do I get the cool stuff?
First of all, a big welcome to SeedHunter! We are very happy to see you around! Now you can start using the platform services. There is a small “but” though:
Please note that for the full functionality we need to run a KYC (Know your Customer). For this purpose you have uploaded a document during the registration. In case this step was skipped, you will have to go to your account settings (“My Account”) and add the missing document or go directly to the KYC tab in you account and complete it.
Participating in a campaign requires some steps to go through:
- Step 1: Find the right campaign (use the campaign search page to get an overview and check out the details of the campaigns)
- Step 2: Set up your participation (define the social channels you want to use and distribute your participation value, select weeks to block in case you have other obligations during the marketing period and confirm the suggested post plan)
- Step 3: Read and sign the Service agreement provided by the project
- Step 4: Deliver the marketing
We will explain the steps in details below.
Step 1: Find the right campaign to do marketing for
Your first go-to point is the Campaign Search page (use the menu item “Campaign search”). Here you will find projects that look for marketing support in their campaigns.
Overview
Each card represents a campaign. On these cards you see already the most important information in short and in relation with other campaigns. Clicking on “Details” you will see the full information of the selected campaign.
The cards show you an overview with following info:
- Tags – these colored tags on top indicate the campaign status, remaining budget etc.
- Campaign image, project name and campaign name along with a short summary about the project
- The dates of the marketing period (this is the time frame in which the marketing activities will be delivered)
- A progress bar showing the booked budget percentage by other influencers (KOLs) already participating
- The target communities (please note that this should match your own communities as close as possible)
- The target geographies (please note that this should match the geographies of your main follower base as close as possible)
Details
Found a campaign that you like and want to know more about it? Great, just click on the “Details” button.
Don’t be scared of all the information here, it is actually useful. We will walk you through it.
First of all you see again the campaign title.
On the left box on desktop (on the top box on mobile) you see the campaign image and below two tabs, “Campaign Information” and “Project Details”.
The campaign information shows you what the campaign is all about. It gives you detailed info on the campaign itself, the goals that the project wants to achieve by this campaign, their USPs (Unique Selling Points) and useful resources like whitepaper, image etc.
Please note that the specific instructions for marketing activities will only be displayed after you have signed up for a campaign (then under “My Campaigns”).
On the right side on desktop (on the bottom on mobile) there is a box with important info:
- The total campaign budget and the percentage of the budget booked already
- The marketing period
- The target communities and geographies the project wants to aim at
You have checked the details and want to participate in the campaign? That’s great, then go ahead and click on “Participation Details” and check the next step!
Step 2: Set up your participation – what do I have to do to agree a marketing scope with the project?
Once you have clicked on “Participation Details” you can configure how much and when you want to do your marketing activities.
Configure your participation
On this screen you will see the main information on top, showing you the marketing period (when will you have to do the actual marketing posts), the duration in weeks and your calculated reward in US$ (this value will change while you adjust the activities below).
In the section “Campaign Participation” you can chose the social channels you want to focus your activity on (the available channels are defined by the project, so not all your channels might be available here).
Once you selected the channels, you can drag the sliders below to adjust the distribution of your activities. Note that on the top progress bar you see a calculated maximum participation value. This is the maximum amount you can sign for (it is calculated on several values including the duration of the marketing period). You also see the expected number of posts along with the reward per post and the total reward.
Please take a special note of the channel specific instructions (below each channels slider). Here you see exactly what the project expects from your posts. You can see that information later in “My Campaigns”, but here you can already make sure, you agree with them.
On the right box on desktop (bottom box on mobile) you can block specific weeks within the marketing period to exclude from activities, e.g. if you have other obligations or unavailability.
After blocking weeks, please recheck the distribution sliders.
When you have configured all the values to your needs, you can get an overview of a posting plan by clicking on the “Participate Now” button.
Review your participation
Okay, well done! Now its review time.
You see again the main information about the marketing dates and duration on top.
Below that you see a table divided into calendar weeks that shows how many posts you agree to deliver following the project’s instructions per channel on each available week (note that the blocked weeks are grey and have zero posts). At the right end of the table, you see your total posts (per channel and overall).
Review this closely and go back if changes are needed. (Please note that once you submit the proposal, the configuration cannot be changed.)
It’s all correct, click “Save”!
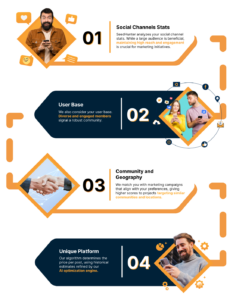
Okay, I set up my participation, but how is my price per post calculated?
Our algorithm calculates your personal maximum participation amount based on your social channel stats, user base, community and geography. We prepared a graphic to explain that a little better.
Step 3: Read and accept the Service Agreement
Great, now it’s time to wrap things up and mutually agree on the cooperation.
Once you have clicked “Save”, you see a table with the campaign title, your participation value and a button “Click here to review and accept” the Service Agreement provided by the project.
This mutual agreement contains all details of the involved parties, the responsibilities and clauses and the agreed number of posts (including the social channels). It also contains the general and the channel specific requirements that the project needs you to follow.
Once you have read the agreement, click the checkbox on the bottom and the “I accept agreement” button.
Now the project will be notified to review the cooperation and also sign the agreement. Once that is done, you are all in.
Step 4: Deliver the marketing
Once the marketing period of the campaign starts, you will start to deliver the agreed marketing activities.
To do so, of course you have to create the posts following the project’s instructions and be sure to include the hashtag defined by the project. This is very important, as our system will detect your posts automatically with this tag.
Additionally there are a few things to remember when posting on X (Twitter), to make sure your posts are discovered:
- Use hashtags within the 280-character limit to ensure they are recognized by Twitter / X. Hashtags in the final part of the post are not indexed by twitter and will not be detected by our platform.
- Make sure your profile is not subject to any suspicion behavior analysis from twitter, age restrictions or any other condition that reduces profile visibility and post indexing.
- Balance the posting as per the weekly scheduled. At no circumstance shall the number of posts be more than 5 on the same day.
- Follow the project/campaign instructions and resource materials, using eye-catching image or video and a link to the project’s website.
- Highlight the project’s unique features, benefits, and noteworthy achievements.
- Please avoid replies (starting with a @handle) as it affects engagement and reach metrics.
My Tasks
On the main menu item “My task” you will see a list of all projects that you signed up for. On the cards you will see the completion status in percent, your current week’s Todos and your expected revenue. Click on the “Content Plan” button to see the detailed planning of your deliveries and a status of done.
Marketing Delivery
When you navigate to “My Account” > “Marketing Delivery”, you can see an overview of all campaigns that are active and the number of delivered posts and planned posts along with the expected revenue and the campaign status.
The arrow at the end of each row shows you the details (all delivered posts of the selected campaign).
How will the project know I posted?
Our system will find all posts automatically. Just make sure to use exactly the hashtag defined by the project in the instructions of the campaign.
In case a post should not be recognized, there is a possibility for you to enter it manually in the Marketing Delivery table of the current week.
Good overview – My Participations > Campaigns
On the main menu item “My Participations” > “Campaigns”-Tab you can see all campaigns that you are or were active in. You can see all information like in the campaign search on the cards. On the detail view you can see all information provided by the project, now (after you signed) also including the marketing instructions.